 Why?
Why?
The first question to ask is why. Why do this at all? Well, the simple reason is that to develop iPhone applications you are required to use the Xcode IDE which is only available using an OSX platform. I have no money, and cannot buy a mac, so I have no other choice but to dual boot the two OSes on the one computer.
I would also like to thank
tonymacx86 for iboot, multibeast and the guides found on the blog, as none of this would be possible without that.
Requirements and Specifications
Firstly I will go through the requirements and the stuff you will need:
- Snow Leopard Retail Install DVD, only$39.00 at the Apple Store with free shipping!
- Windows 7 Install DVD
- iBoot Supported ISO (download) - Used to boot the system before installing Chameleon
- Multibeast (download) - Used to install additional kexts after Snow Leopard installation
- Mac OS X 10.6.4 Combo Update (download) - Used to upgrade Snow Leopard to latest version
- Chameleon Boot Loader (download) - Used to select which OS to boot
- Blank CD, to burn iBoot
I am also going to list my hardware specifications. If you have a different type of CPU eg. i3, i5, i7 then I would recomend you look at the tonymacx86 guides as this guide is specifically for Core 2 CPUs. Also, this guide covers nVidia 9 series graphics cards. If you have an ATI card or a newer nVidia card I cannot guarantee this will work.
My hp dv5-1138tx specifications:
| CPU | 2.26 GHz Intel Core 2 Duo Processor P8400 |
| Memory | 4gb |
| Graphics | NVIDIA GeForce 9600M GT 512mb |
| Hard Drive | 250 GB (5400 rpm) |
| Network | Integrated 10/100/1000 Gigabit Ethernet LAN |
| Wireless | Intel WiFi Link 5100 |
Step One - Booting iBoot
Before you continue please ensure you have anything you need on your computer backed up, as this process will erase everything on your hard drive!
Burn the iBoot ISO to your blank CD and place it in the CD tray. Restart your computer and when the HP logo appears, press the ESC key. This will allow you to select the CD, rather than the hard drive to boot from.
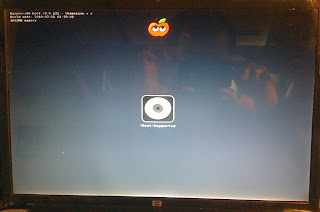
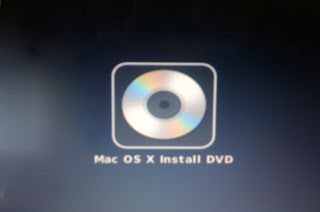
After selecting the CD, iBoot should begin to load. You will be presented with a screen with just the iBoot CD and possibly your Windows Partition. Remove the iBoot CD, place the Snow Leopard DVD in the tray and hit F5. Don't worry if any errors pop up, its just waiting to read the Snow Leopard DVD. Once it has, choose the Snow Leopard DVD option and hit enter.
Step Two - Preparing your hard drive
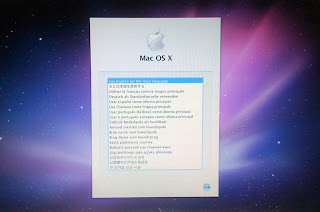
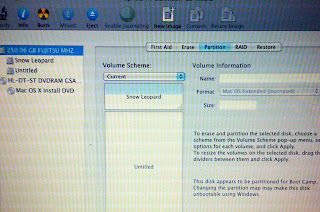
The next step is to run Disk Utility from the Snow Leopard install screen. We are not installing Snow Leopard at this stage! Once the Snow Leopard DVD has finished loading, select your language and then select Disk Utility from the Utilities menu.
Select your hard drive from the list along the side, and then click the partitions tab. From the drop down menu, select two partitions. Name the first one 'Snow Leopard' and give it an appropriate size. I chose 40gig, which is plenty for developing, but I certainly wouldn't choose anything below 20gig as an absolute minimum. Also ensure you select Mac OS Extended (Journaled) as the format type.
Next, select your second partition and rename it Windows 7. Ensure you select MS-DOS as the format type.
Finally, select the Options button and select GUID as the partition type and apply the changes.
Quit the Snow Leopard installer, insert your Windows 7 DVD and restart your computer.
Step 3 - Installing Windows 7
I am not going to go into a great amount of detail in this step, suffice to say you must select and format the Windows 7 partition we created earlier in the Disk Utility. It should be the third partition on the list. Allow the installation to complete and you should have a bootable Windows 7 install.
Step 4 - Installing Snow Leopard
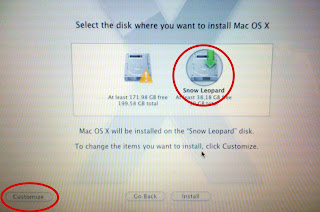
The next step is to install Snow Leopard. You must boot the Snow Leopard DVD once again, using the iBoot CD process explained in step one. Once the DVD has finished loading, click select a language and click continue to begin the installation process. You may want to customize your installation and remove extra features like languages, fonts and printers that just take up space. Once thats done, select your Snow Leopard partition and click Install.
Once the Snow Leopard install completes, you should be greeted with a nice message saying its successfully installed.
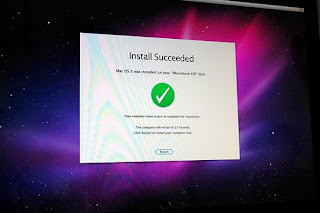
Once this is done, place the iBoot CD back into the CD tray and restart your computer.
Step 5 - Upgrading and Multibeast
You should now be able to see your Snow Leopard installation in the iBoot bootloader. Select it and hit enter to boot Snow Leopard. Once Snow Leopard is booted, download the Multibeast and Combo Update listed in the requirements section. Unfortunately because Wifi is not currently supported, you will need to use an Ethernet cable to connect to the internet or alternatively boot into Windows 7 and download the software and copy to an external hard drive, USB stick or CD.
Run the Combo Update but do not let it restart the computer. Once the upgrader has finished run Multibeast. Multibeast allows you to select kernel extensions for your specific hardware, and I will list the ones I used for my laptop. Yours may vary, but if you have similar hardware to mine, it should work perfectly.
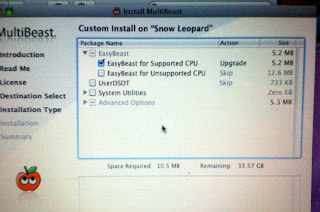
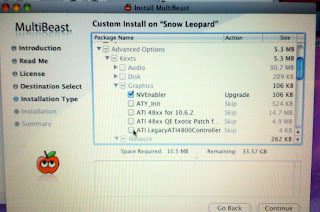
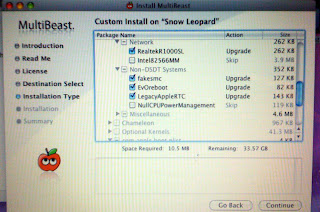
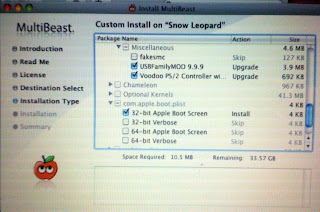
Once you have selected all the relevant kexts, install multibeast and restart your computer, with iBoot in the CD tray.
Step 6 - Installing Chameleon
Chameleon is a boot loader that allows you to boot multiple operating systems. It basically replaces the iBoot CD we have been using and boots directly from your hard drive. Although Multibeast is supposed to install Chameleon automatically, for some reason with my set up it did not work. This means we are going to have to install it manually. Boot Snow Leopard once again from the iBoot boot loader.
Once Snow Leopard has booted, download the Chameleon boot loader using the above link and extract the folder to your desktop.
Open a terminal window and type: diskutil list
This will list all your hard drives and partitions. Locate your OS X partition (should be called Snow Leopard) and note down the Identifier, which should be 'disk0s2'.
Next, type: cd and drag your Chameleon folder from the desktop into the terminal window and hit enter.
Next, type: cd i386 and hist enter.
Next, type: sudo fdisk -f boot0 -u -y /dev/rdisk0 and hit enter.
Next, type: sudo dd if=boot1h of=/dev/rdisk0s2 (or whatever your identifier was that you noted down earlier) and hit enter.
Next type: sudo cp boot / and hit enter.
That should have installed Chameleon. Remove the iBoot CD and restart your computer. You should be greeted with the Chameleon boot loader screen (similar to iBoot) and be able to select from either your Snow Leopard or Windows 7 partitions.
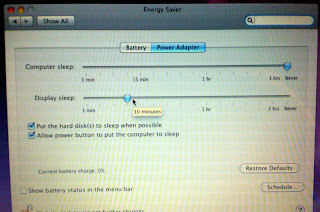
Step 7 - Turning off sleep
For some reason, whenever the laptop enters sleep mode, it fails to reboot. For now the only option is to prevent it from sleeping. Go into system preferences and click Power Saver. In Power Saver, move the toggle all the way over to 'Never' for the sleep mode in both the 'On Power' and 'Battery' tabs. If I am able to solve this problem, I will post an update.
All done!
You should now have a working Dual Boot with Snow Leopard and Windows 7!


